1 Introduction
The Sandberg USB All-In-1 Hard Disk Link enables you to connect any hard disk to USB to give you instant access to its data. A far quicker and easier solution than having to install the hard disk in your computer.
2 Connecting the hard disk
2.1 Hard disk type and size
The way a hard disk connects to the adapter depends on the type and size of the hard disk. You must therefore first check what type of hard disk you are connecting:
A. SATA
Small 2.5” SATA hard disks from laptops and large 3.5” SATA hard disks from desktop computers use the same type of connector and therefore connect to the adapter in the same way. See how to connect a SATA hard disk in section 2.2.
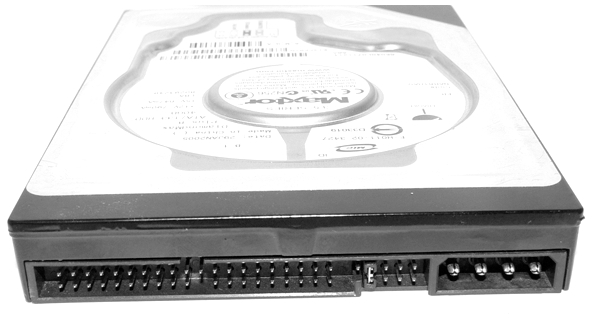
B. 3.5” IDE hard disk
3.5” IDE hard disk from a desktop computer. See how to connect a 3.5” IDE hard disk in section 2.3.
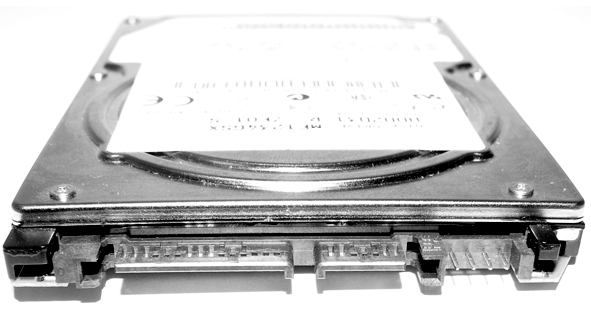
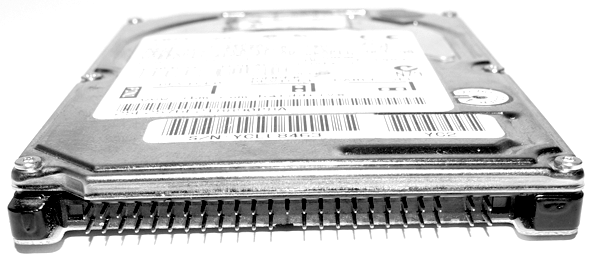
C. 2.5” IDE hard disk
2.5" IDE hard disk from a laptop. See how to connect a 2.5” IDE hard disk in section 2.4.
NB: If you have a 2.5” hard disk from a laptop and are unable to find a port in the previous view, it is probably because the laptop manufacturer has added an adapter bracket to the hard disk’s port. Remove the adapter bracket so the original port becomes visible.
2.2 SATA hard disk
- Connect the hard disk to the SATA port on the adapter using the cable provided.
- Connect the enclosed power adapter cable to the hard disk and connect the power supply to the mains.
- Connect the black USB connector from the adapter to your computer’s USB port.
2.3 3.5” IDE hard disk
- Set the hard disk to “Master” (for more information, see the documentation accompanying the hard disk or on the manufacturer’s website).
- Connect the hard disk to the large IDE port on the adapter and then connect the power supply.
- Connect the power supply to a mains socket.
- Connect the black USB connector from the adapter to your computer’s USB port.
2.4 2.5” IDE hard diskk
- Connect the hard disk to the small IDE port on the adapter.
- Connect the black and red USB connectors from the adapter to your computer’s USB ports.
3 Installing the adapter
- Start the computer
- Connect the adapter (see section 2).
- The computer will install the drivers for the adapter automatically.
The adapter is now installed and ready for use.
4 Using the adapter
When you connect the adapter, a new drive is created on your computer. You can use this drive in the same way as any other drive on your computer.
If you need to see all the drives on your computer you can find them under “Computer/My Computer”.
5 Troubleshooting
If Windows detects the adapter but a new drive is not shown:
- Check that the connected hard disk is formatted/partitioned. For more information, see the documentation accompanying the hard disk or on the manufacturer’s website.
- Check that the enclosed power supply is correctly connected and that it is on (see section 2).
If you need further help or assistance with your Sandberg product, you can visit the website http://helpdesk.sandberg.it.
Have fun with your Sandberg USB All-in-1 Hard Disk Link! |